December 26, 2011

Corn Thing... You Make My Heart Sing

Corn Thing...  I think I love you.  I should be mortified that I'm putting this "recipe" here, but honestly it's so good I think I get a pass.

I dare say this barely qualifies as a recipe.  Anyone with even little to no cooking experience can dump out the contents of a box, mix it together, throw it in an oven and (hopefully) pull it out before it burns;  but let me reiterate- this thing is so yummy it makes up for its ridiculous simplicity and albeit slightly "white-trashiness".

This alongside a piece of glazed ham is divine.


Corn Thing
  • 16 ounces frozen corn
  • 1 can cream-style corn
  • 1 box corn muffin mix
  • 1 cup (8 oz) sour cream
  • 2 eggs
  • 1/3 cup butter, softened
  • 1/2 tsp kosher salt
  • 1/4 tsp fresh black pepper

  1. Beat butter and eggs together. 
  2. Add sour cream and corn.  Stir to thoroughly combine.
  3. Add muffin mix and stir to combine again.
  4. Pour into a 9x9 glass baking dish and bake at 350 for 45 - 60 minutes. 
      **A knife inserted in the center should come out clean to test for doneness.


    December 23, 2011

    Praise the Braise...

    It's no secret that winter is my least favorite season, however it does get serious bonus points for the kind of cooking that it ushers in... the braise!  Culinary comfort, the only real benefit of freezing temperatures.

    Braises are perfect for winter.  It's a long, slow process (which is how winter feels to me) and it is usually comfort food cooking.   What is a "braise" exactly?   In its most basic definition, it's cooking something (usually meat) in a liquid (usually stock, wine or a combination thereof) for a long period of time on a low heat.  Most often, braises are tough cuts of meat that benefit from long, slow cooking turning them into the most succulent and flavorful of meals.

    Another benefit of braising is,  it's easy.  Many braises are one-pot meals, some with a side of starch (and we all know how I love that...) which means you aren't left with an entire sink of dirty dishes, something else I can really appreciate.

    I have a particular pot that I use for braises, it is a Le Creuset enameled cast-iron pot.  I have had this pot for almost 15 years.  It has made hundreds of meals and looks almost the same as the day I bought it.   This is one very good example of "you get what you pay for".   These are expensive, but it is something you only buy once.

    I wanted to do a post about braising and was searching for short ribs that would make the cut.  It took some time, but I found locally raised organic meat with beautiful marbling and so in went the ribs... deciding what to put with them was easy.  I had been craving rutabaga, which I know is not something you hear everyday, so once I had my veggies I was ready to get this braise going.


    Braised Short Ribs with Rutabaga Parsnip Puree
    • 6 beef short ribs
    • 1 large red onion, cut into large dice
    • 1 large Spanish onion, cut into large dice
    • 4 carrots, cut into 1 inch pieces
    • 3 celery stalks, cut into 1 inch pieces
    • 3 tbsp tomato paste
    • 1/2 bottle red wine
    • 2 cups beef stock
    • 2 cloves garlic, smashed
    • 2 bay leaves, fresh if possible
    • canola oil
    • all-purpose flour
    • kosher salt
    • black pepper
    • 1 medium Yukon gold potato, peeled and cut into 1 inch dice
    • 1 large rutabaga, peeled and cut into 1 inch dice
    • 3 parsnips, peeled and cut into 1 inch pieces
    • 4 tbsp butter
    • 3/4 - 1 cup milk


    1. In a heavy ovenproof pot,  add enough oil to your pot to reach 1/4 inch up the side and heat over high heat.


    2. Put about a cup of flour on a plate and add a little salt and pepper to it, mix it with your fingers and dredge the short ribs in the flour.  Shake off the excess flour and set aside.


    3.  When the oil is hot,  carefully add the ribs to the pot and brown on all sides.  You may have to do this in two batches; you don't want to crowd them or they won't brown properly.  Remove the ribs from the oil and set on a plate lined with paper towel.  (This can be done a day ahead if you are pressed for time; cover and refrigerate until ready to braise)

    4.  Preheat the oven to 275 degrees.  Pour out the oil and add the onions.  Saute on medium heat until softened and beginning to caramelize.  Add a big pinch of salt and a few turns of the pepper grinder and stir.  Add the carrots and celery and cook for 5 more minutes.  Add tomato paste and cook for another few minutes.

    5.  Put the ribs back into the pot.  Add the bay leaves, garlic, wine and stock.  Season with a few pinches of salt and a few more turns of the pepper grinder.  Bring the pot to a simmer, cover and slide into the oven for 4 hours.


    6.  Remove the pot from the oven and allow the ribs to cool slightly, uncovered.  Remove the ribs and set aside.  Remove bay leaves and discard.

    7.   Skim the fat from the surface, then puree the braising liquid and vegetables to make a gravy.  Put the short ribs back in and keep warm.

    8.  Bring water to a boil in a large pot.  Add rutabaga and boil for 5 minutes.  Add the potato and parsnips and continue boiling until tender.

    9. Drain and put back into pot on low flame to help remove some of the water from the vegetables.  Add milk and butter and beat with an electric mixer until consistency of mashed potato.  Season with salt and pepper.

    Braised Short Ribs on a puree of Rutabaga & Parsnip

    *It may not be the most beautiful of plates, but it is guaranteed to be delicious.

    December 18, 2011

    Move over Swiss Miss...

    No offense to Swiss Miss, but it pales in comparison to the real deal.  It will do in a pinch, but during the holidays it's nice to make something special. 

    I usually make this treat "to go"...  I put it in big travel mugs and we sip it as we stroll the neighborhood looking at the Christmas lights.

    The peppermint schapps in it is delicious, but you might want to skip it if you're making it for kids...


    Peppermint Hot Chocolate
    • 1 quart whole milk
    • 1/3 cup sugar
    • 1/4 cup good quality cocoa powder (I use Valrhona)
    • 2 shots peppermint schnapps
    • 1 cup heavy cream
    • 3 tbsp. powdered sugar
    • 1 tsp. vanilla
    • crushed candy canes

    1. Combine heavy cream, vanilla and powdered sugar.  Beat with electric mixer on highest speed until soft peaks form.  Set whipped cream aside.
    2. In a small pot, combine cocoa powder, sugar and milk.  Bring to a simmer over medium heat, do not allow to boil.  Turn off heat and stir in schnapps.
    3. Pour hot chocolate into mugs, top with a dollop of whipped cream and sprinkle crushed cane on top.


    December 10, 2011

    My Darling Clementine...

    There is something inherently "Christmas-y" about clementines.  I suppose it has something to do with their season being around the holidays or perhaps because every Christmas for as long as I can remember my Mom put an orange in the toe of our stockings...

    The bright citrus aroma of this sweet little seedless fruit just makes the house smell festive and when the mercury drops and you are puttering around the house,  this is the perfect baking endeavor. 

    This cake really isn't much work at all; the food processor does all the chopping for you and all you are left with is a little stirring and let's be honest, that isn't very taxing at all.

    This recipe is basically Nigella Lawson's with a few slight changes, who got her inspiration for this cake from Claudia Roden.  I discovered this cake over a decade ago and I've made it every Christmas since then.  It is perfect with  coffee or tea, great as a light dessert or pretty much anytime you want a little sweet.  I find it gets even better the next day, if you can stand walking past it for 24 hours without diving into it.

    Clementine Cake
    • 4 - 5 clementines (1 pound total weight)
    • 6 eggs
    • 1 1/4 cups  sugar
    • 2 1/3 cups ground almonds (almond flour)
    • 1 heaping tsp baking powder
    • 1 tsp vanilla
    • powdered sugar


    1.  Put the clementines in a pot with cold water to cover, bring to a boil and cook for 2 hours. 


    2.  Drain clementines and when cool break in half and remove any seeds (if there are any) then put entire fruit into the bowl of your food processor and let it rip until the fruit is reduced to a pulp.


    3.  Preheat oven to 350 degrees.  Butter and flour an 8-inch springform pan.  (You can use the ground almonds for this as well)

    beautiful blue heirloom eggs

    
    4.  Beat the eggs.  Add the sugar, almonds and baking powder.  Mix to combine and add the chopped clementines.  Stir until thoroughly combined.


    5.  Pour the cake mixture into prepared pan and bake for an hour, covering after 40 minutes or so to prevent the top from burning.  Pierce with a skewer or knife to check for doneness. (It should come out clean).  


    6.  Remove from oven and leave to cool in the pan.  When the cake is cold, remove from pan dust with powdered sugar.
    If you feel like channeling your inner domestic goddess, make a glaze for the top with powdered sugar and orange juice and lightly drizzle over the top in lieu of dusting.

    My Darling Clementine


    December 06, 2011

    ' Tis the Season...

    Christmas cookies are perhaps the very best part of the holiday season.  I get a bit overzealous when deciding how many varieties I can feasibly make.   Others try to be the voice of reason, but nevertheless I get swept up in a cookie frenzy wanting to bring out all the old favorites and at least a few new recipes that look promising.

    The one classic (besides gingerbread) that can't be left out are sugar cookies.  They are almost everyone's favorite and decorating them is something everyone can take part in.  I usually gather every last sprinkle, every kind of decoration and all of the luster dust I can find for this particular project, as I tend to get a little "Martha Stewart" during the whole process...

    Luster dust is an edible food color that comes in powdered form.  By mixing it with a drop or two of  vodka, it becomes a "paint" to color the frosting or the cookie itself.  It comes in every imaginable color and for snowflake cookies that are decorated white, the silver or iridescent luster dust looks beautiful.  It can deepen the colors of the frosting or just add a little shine or sparkle to give them an extra special look.  When using, make sure you use "non-toxic" or "food-grade" luster dust, as some are not meant for consumption.


    Sugar Cookies
    • 5 cups all-purpose flour (plus more for dusting)
    • 4 sticks butter, room temp
    • 3 cups sugar
    • 2 large eggs
    • 2 tsp vanilla
    • 1 1/2 tsp salt
    • 2 tsp finely grated lemon zest (optional)
    1. Combine flour and salt in a bowl, set aside.
    2. In the bowl of a stand mixer, with paddle attachment, combine butter and sugar.  Beat on medium speed until fluffy and light in color, about 5 minutes.  If using a hand mixer about 7 - 8 minutes.
    3. Add the eggs and beat on medium high speed, then add the vanilla and lemon zest if using.
    4. Add flour in three batches and mix until just combined.
    5. Divide the dough in half,  form it into disks and wrap tightly in plastic.
    6. Chill for at least 2 hours before rolling out.
    7. Preheat oven to 350 degrees.
    8. Dust surface with flour before rolling out.  
    9. Cut out shapes with cookie cutters and place on baking sheets.  If dough gets too warm, put cookie cutouts in refrigerator for at least 30 minutes.  Put in oven, on middle rack and bake for 12 to 15 minutes.
    10. Let cool on baking sheet for a few minutes before transferring to rack to cool completely.
    *This recipe will yield a few dozen cookies.  Remember to bake cookies of the same size together.  If you have a large cookie cutter and a small one, bake them separately as they will not bake in the same amount of time.
      Royal Icing
      • 1 lb. powdered sugar
      • 1/2 cup water
      • 5 tbsp meringue powder

      • food coloring
      • assorted sanding sugars
      • sprinkles
      • nonpareils
      - Combine powdered sugar, meringue powder and water until smooth.

      - Icing sets up fairly quickly, do not mix icing until you are ready to frost the cookies.  Use assorted food coloring to dye the frosting.  I prefer to use gel or paste food coloring instead of liquid, a little goes a long way.

      - To pipe frosting, (if you don't own piping bags) put in re-sealable sandwich bag and clip a corner of the bag off and use as a piping bag.

      - Add sprinkles or sanding sugar to your cookies immediately after frosting.
      - Use luster dust after royal icing has set completely.

      Happy Baking!


      cookie from Shellco

      December 02, 2011

      Stir the Pot...

      Risotto is one of those foods that require demand a long, leisurely approach.  On a cold winter afternoon when the wind is blowing outside and the last thing I want to do is brave the cold, THIS is the kind of food that happily keeps me indoors and in front of the stove.

      This is comfort food on every conceivable level. On days when you need a bit of a mental break, I whole-heartedly recommend making risotto... 20 minutes of stirring while you lovingly watch the pot of rice in front transform into something ethereal you can be just what you need.

      The whole key to risotto is the slow process allowing the creaminess of the rice to come out and that can only be achieved by not rushing it.  Knowing this going into it makes the constant stirring a welcome change of pace from the frenzied dinner preparation most of us normally experience.

      Don't let the thought of the stirring deter you from making this,  it really isn't more than a bit of pouring in stock and stirring for the better part of the cooking.  Some people find it a bit off-putting to be tethered to a stove for a period of time,  but if you have children that are a little older have them do the stirring for you.  Getting your kids involved in the kitchen is the best way for them to learn.

      As always, having everything ready to go (or your mis-en-place) will make things go smoother so measure out the ingredients before you start the rice.

      Butternut Squash Risotto
      • 1 butternut squash, peeled, seeded and diced small (1/4 inch pieces)
      • 2 tbsp olive oil
      • 6 cups chicken stock, homemade is best but if you buy it get the best quality you can find
      • 4 tbsp unsalted butter
      • 2 large shallots, minced
      • 10 ounces Arborio rice (1 1/2 cups)
      • 1/2 cup dry white wine
      • 1 cup freshly grated Parmesan cheese
      • kosher salt
      • freshly ground black pepper
      • 1 tbsp fresh sage, finely chopped

      1. Before we get started,  a word about the wine...  When you cook with wine, it doesn't need to be expensive, but it does need to be good.  Always cook with something you would drink, the food will reflect it if you do otherwise.
      2. Preheat oven to 375 degrees.  Toss the diced butternut squash with the olive oil, 1/2 tsp kosher salt and a few turns of the mill of fresh black pepper.  Lay the butternut squash out on a sheet pan in a single layer and roast in the oven for about 20 - 25 minutes until very tender and slightly caramelized. Set aside.
      3. Heat the chicken stock in a saucepan.  Leave it on low heat, it needs to stay warm as you add it to the rice.
      4. In a heavy-bottomed pot, melt the butter and saute the shallots on low - medium heat for about 10 minutes until the shallots are translucent. Add the sage and let it perfume the butter.  Add the rice and stir to slick the grains of rice with the butter.
      5. Add the wine and cook for 2 -3 minutes, then add 2 ladles of simmering stock to the pot.  Season again with a little salt & pepper.   We're building flavor here, so we need to season as we go...  Give it a good stir, let it simmer and keep stirring until stock is absorbed, about 5 - 10 minutes.
      6. When stock has been absorbed, add in 2 more ladles and stir frequently until the stock is absorbed and rice is cooked through, but still al dente.  (about 30 minutes).
      7. Remove from heat, add Parmesan cheese and roasted squash.  Stir to combine and serve.

      Mangia!

      November 25, 2011

      Sticky Sweet Bacon Goodness

      It's bacoooon!  Who doesn't love bacon?! (besides vegetarians and even some of them come to the dark side for the love of the slab)

      My Mom had come across a recipe for bacon jam and being the good Midwestern woman she is, promptly got my Dad to make it.  When she called raving about how delicious it was, I knew it had to be shared.

      I will forewarn you that while the bacon jam is simmering away in the crock pot you may want to focus your energy elsewhere.  The smell is incredible and the hours waiting for it to be done feel like years.

      This is something that would make a great gift sealed in pretty glass jars or a topping for crostini for a holiday party.  I took my Mom's lead on how I chose to enjoy my bacon jam...

      There is one correction to the original recipe,  it says that it yields 3 cups but it actually only yields 2 so you may want to make a double batch if you plan to gift it.


      Slow-Cooker Bacon Jam
      recipe courtesy of Everyday Food

      • 1 1/2 pounds sliced bacon, cut crosswise into 1 inch pieces
      • 2 medium yellow onions, diced small
      • 3 garlic cloves, smashed and peeled
      • 1/2 cup cider vinegar
      • 1/2 cup packed dark-brown sugar
      • 1/4 cup pure maple syrup
      • 3/4 cup brewed coffee

      1. In a large skillet, cook bacon over medium-high, stirring occasionally, until fat is rendered and bacon is slightly browned, about 20 minutes.  With a slotted spoon, transfer bacon to paper towels to drain.  Pour off all but 1 tablespoon fat from skillet (reserve for another use); add onions and garlic, and cook until onions are translucent, about 6 minutes.  Add vinegar, brown sugar, maple syrup and coffee and bring to a boil, stirring and scraping up brown bits from skillet with a wooden spoon, about 2 minutes.  Add bacon and stir to combine.
      2. Transfer mixture to a 6-quart slow cooker and cook on high, uncovered, until liquid is syrupy, 3 1/2 to 4 hours.  Transfer to a food processor, pulse until coarsely chopped.  Let cool, then refrigerate in airtight containers, up to 4 weeks.

      Unctuousness defined.

      November 20, 2011

      Don't Mess with Perfection

      That's a pretty bold statement, I know...   but here's the thing:  the Thanksgiving meal is perfection.  Why do people feel the need to "try out a new recipe" or "change it up"?

      I know I sound a bit stodgy but there is only one day out of 365 of them that I'm asking the menu not be "tweaked", "altered" or "updated" with some new technique, ingredient or what have you.

      As we are all gearing up for this holiday, the only one that is REALLY food-centric I am standing by my convictions.  Why do people feel the need to change something that is already so good?

      It really is perfect...  Turkey, stuffing, mashed potatoes & gravy, candied sweet potatoes, green beans, cranberry sauce (perfect for turkey sandwiches the next day), maybe a few other vegetable sides,  rolls and at least a few different pies that must include pumpkin as one of them.

      Can you really ask for anything else?  As a self-proclaimed lover of all things carb, this is squeal-inducing bliss for me.  Carbs with a side of carbs!  (it's one day, indulge yourself)

      Thanksgiving is the meal I really love.  It is consistent and comforting,  the smells and tastes are a rush of memories for me from my childhood up to present day.  Think about it,  I'm sure when you think of Thanksgiving it floods your memories with the same emotions.  Food and family are what it's all about.  Eating way too much and then eating just a little more...


      My grandmother's stuffing is something I have to have on Thanksgiving and if I don't have it,  it just feels like another day to me.

      My grandma wasn't the best cook, that's as nicely as I can put it.  I'm not spilling any deep family secret,  cooking just wasn't her forte, but the one home-run she could hit out of the park every single time was stuffing.  It may not be for everyone, but this is worth every carb-lovin' bite for me.  It is simple, basic bread stuffing with celery, onion and sage.  It isn't anything fancy or "modern" in the least and that is why I love it.  It reminds me of being a kid and the anticipation of all of us sitting down together.  My grandparents, my uncle, my Momma, my brother & me.

      Thanksgiving isn't just about the food,  it is about the time spent with family gathered around each other and being thankful for the people you have in your life.  The size of my family has dwindled as I've gotten older, as I'm sure is the case with most of us and the recipes I have from my family are one of the things I treasure most.  They provide a tangible link to family members that I can no longer share a meal with.

      So, this Thanksgiving I will be making my Grandma's stuffing and remembering my family with every bite.


      Gram's Bread Stuffing
      • 1 (large) loaf white bread, torn into small pieces
      • 3 eggs
      • 1 tbsp ground sage
      • 3 stalks celery, diced
      • 1 medium onion, diced
      • 3 - 4 cups chicken stock
      • 1 tbsp. salt
      • 1 tsp. pepper
      • 2 tbsp. butter


      1. Preheat oven to 350 degrees.
      2. Combine celery, onion and chicken stock in a sauce pan and bring to a simmer.  Let it cook for 10 minutes or until softened.
      3. Put bread, eggs and spices in a large bowl and pour the stock mixture over the bread.  Mix to thoroughly combine.  (it is easiest to do this with your hands, so let it cool if it is too hot for you to handle, also make sure eggs are thoroughly mixed in to avoid bits of scrambled egg)
      4. Take a pinch of the stuffing out and fry it to check for seasoning.  Once everything is in the oven, the chance to add more salt, pepper or sage has vanished.  Taste the patty of stuffing and adjust if needed before moving on.
      5. Butter the baking dish and put the stuffing mixture in.
      6. Bake at 350 for an hour. Depending on the depth of your baking dish, you may need to bake for an additional 15 - 20 minutes. 
      7. Baste occasionally with additional stock if necessary to avoid it drying out. 

      Happy Thanksgiving!

      November 17, 2011

      Tiers of Joy

      It's been awhile since I've had dessert and with the holidays right around the corner, that streak will be coming to a screeching halt.
      Making a dessert like this is generally not too time-consuming which is a game-changer during the holidays when we are all pressed for time and running on empty.

      This particular trifle comes together fairly quickly since there is no cooking to speak of, just a bit of manual labor and even that is minimal.
      Trifles are a bit like window shopping... because they are usually served in a clear vessel, you can take a look at what you are getting before you decide to plunge in.

      They are lovely with all of their layers and I like doing these individually so everyone gets a beautiful dessert all to themselves. (and the fact that I don't own a proper trifle dish has something to do with that decision as well...)


      Amaretti Trifle

      • half of one store-bought pound cake, cut into 1/4 inch thick slices
      • 1/4 cup black currant or seedless blackberry jam
      • 8 oz mascarpone
      • juice of one lemon
      • 2 tbsp milk
      • 4 tbsp. powdered sugar
      • 4 oz. amaretti cookies
      • 6 tbsp Kahlua
      • 2 tbsp. toasted, sliced almonds

      1. Make little sandwiches out of the pound cake and the jam.  Cut them into 1 inch cubes and set aside.
      2. In a food processor,  reduce the amaretti cookies to crumbs. (or if you are having a bad day, put in resealable plastic bag and whack with a rolling pin)
      3. Combine the lemon juice and the powdered sugar.  Mix well so the powdered sugar dissolves.  Add milk and 2 tbsp Kahlua, then add to the mascarpone.
      4. Using an electric mixer, whip mascarpone mixture until it is light and billowy.
      5. Brush the little sandwiches generously with the Kahlua.
      6. Place your tipsy pound cake into the glass and press them down into the bottom.  Cover with some of the amaretti cookie crumbs. Dribble a little more Kahlua over the cookies.
      7. Spoon in the mascarpone to cover the soused cookies.
      8. Add another layer of amaretti crumbs and finish with a layer mascarpone.
      9. Sprinkle with amaretti crumbs and toasted, sliced almonds.
      serves 4

          November 12, 2011

          Squashing Hunger...

          Acorn squash is one of those little gems that most people probably just pass on by at the store and don't even give a second look.

          Well, stop and give it a second glance.  Squash, whether they be acorn, butternut, spaghetti or any other variety you happen upon at the store (or ahem...  Farmer's Market) are delicious and now is when they are at their peak.  They are wonderful roasted in the oven or scooped out and stuffed with whatever you can dream up.

          This humble little vegetable may not be the latest "in" thing on the restaurant scene or some new discovery that will help you live to over 100 years of age but what it is...  is delicious.
          The flesh takes on an almost buttery texture when roasted and the caramelized squash is sweet and melts in your mouth it's so tender.

          For those who are less than thrilled about eating vegetables or are less inclined to try new or unfamiliar things,  roasting veggies is almost always a hit.  Roasting them brings out their natural sweetness making them more palatable to picky or less-adventurous eaters.


          Stuffed Acorn Squash
          • 2 acorn squash  (cut in half lengthwise, seeds removed)
          • 1 cup cooked wild rice
          • 1/2 cup chicken stock
          • 1 small onion, diced
          • 1/2 pound ground Italian sausage
          • 1/4 cup dried cranberries
          • 2 tbsp pine nuts, toasted
          • 1 tbsp fresh marjoram, chopped
          • 2 tbsp olive oil
          • 2 tbsp butter
          • 1 tsp kosher salt
          • 1/4 tsp freshly ground black pepper
          1. Pre-heat oven to 375 degrees.
          2. Cut off a small piece from the outside of the squash so you will have a flat surface on the bottom to prevent it from rolling over.
          3. Place acorn squash on oiled sheet pan, cut side down (inside), and roast in oven for 40 minutes.
          4. While squash is in oven, make the filling...
          5. Heat olive oil in a saute pan over medium heat, add onion and cook until translucent.
          6. Add sausage and cook thoroughly, add cranberries, rice, chicken stock, salt & pepper.
          7. Let the filling simmer for about 10 minutes and remove from heat.
          8. Add pine nuts and marjoram. Check for seasoning and adjust if needed.
          9. Remove squash from oven and carefully turn over.  Turn oven down to 350 degrees.  Fill each half, dot each with a little butter and put back in the oven for another 30 minutes.
          ready for the oven...


          Done!

            November 05, 2011

            Football Fare

            Every football fan knows that food is an integral part of the game-watching experience, or is that just me?!
            Well, in our house we planned it out like it was a major holiday.  The Ohio State-Michigan game was the pinnacle of football season and for the majority of my football-loving friends and family it still is.
            There was one particular year that we had everything you could possibly imagine on the table for the game,  I secretly dubbed it "pig-fest" (you know, pig-skin, football, food, gorging oneself...)  It was unbelievable.  To this day there has never been another one like it, which for our own health is probably a good thing.

            Chili is a great football food, you can make it in a huge batch the day before or the morning of the game and the longer it sits, the better it gets.

            I made some last night in preparation for today's Buckeye game and as good as it was last night, I know it will have developed even more flavor today.
            This recipe is courtesy of my Dad (thank you!) and it's the only chili I ever make.  It is delicious, but it reminds me of home and as is the case with most of the things I make for myself it is familiar and comforting food.


            Turkey Chili
            • 1 lb. organic ground turkey
            • 2 cans diced tomato (14.5 oz can)
            • 2 medium yellow onions, diced
            • 3 or 4 stalks celery, diced
            • 2 cans kidney beans, rinsed (15.5 oz can)
            • 1 clove garlic, crushed
            • a few tbsp sugar (to cut acidity from tomatoes)
            • 3 - 4 tbsp chili powder
            • salt & pepper
            • 2 tbsp canola oil

            1. Heat canola oil over medium heat and add onions and celery.  Cook until soft and translucent.
            2. Add turkey, break it up and cook through.  Add whole, crushed clove of garlic, chili powder and season with salt & pepper.
            3. Add diced tomato and  sugar.  Simmer for at least a half hour, stirring occasionally.
            4. Add beans and simmer an additional 30 minutes, check for seasoning and adjust as needed.
            5. Remove clove of garlic, and dig in.

            November 01, 2011

            Soup's On!

            While the cooler temperatures are not my cup of tea, the food that comes with them is.  I love soups, stews, braises, roasted dinners, etc.
            It is comforting, stick to your ribs kind of food and when the weather is chilly that's exactly what I want.  Gone are the days of salad for dinner...

            One of the benefits of  this type of cooking is that you have leftovers.  This for me is key because along with this time of the year comes my hectic work schedule and being able to come home and heat something up instead of trying to figure out what I'm going to cook is a life-saver.

            This particular meal comes together in no time at all as long as all of your prep is done ahead of time.
            When I have a few extra minutes, I make sure all of my ingredients are ready to go so that the actual cooking part is a snap.  This is perfect for a weeknight meal when energy is not in abundance.

            This recipe uses leeks and if you have never worked with them before, this is how to handle them:
            - use only the white and light green parts
            - split in half lengthwise and rinse VERY well, there is sand between the layers that needs to be removed.


            Potato Corn Chowder with Leeks & Bacon
            • 1 cup bacon, cooked and diced (reserve 1 tbsp bacon fat)
            • 2 tbsp butter
            • 3 tbsp flour
            • 4 cups diced leeks
            • 32 oz chicken stock
            • 2 cups water
            • 5 small yukon gold potatoes, cut into 1/2 inch pieces
            • 2 cups corn
            • 1 tbsp freshly ground black pepper
            • 1 clove garlic, smashed
            • 1 1/2 cups milk *
            1. Heat the bacon fat and butter in a stock pot and add leeks.  Cook until soft.  Like onions, leeks will cook down quite a bit. 
            2. Add flour to make a roux.  Let this cook out for a few minutes until it starts to turn a golden blond color.
            3. Add chicken stock and water, whisk to combine.
            4. Add potatoes, corn, garlic and pepper.
            5. Simmer for about 20 minutes until potatoes are cooked through, remove garlic clove.
            6. Add bacon and simmer an additional 5 - 10 minutes.
            7. Remove from heat and add milk.  *if you are a size 6 or less, please substitute heavy cream for milk.  
            8. Garnish with fresh herbs.

            October 21, 2011

            Gettin' Figgy With It...


            I LOVE figs and lucky for me I live in a predominantly Italian neighborhood where fig trees are the preferred lawn ornament.  Now is the time when the branches are heavy with fruit, hanging low enough that plucking them from the tree does not prove to be very difficult.
            (and don't think I haven't contemplated enlisting my friends for a little late-night recon mission to "obtain" said fruit)

            Figs are in season from late summer through early fall, so if you happen upon them at the farmer's market or the grocery store,  get them while you still can.

            I had never made fig jam before but I figured since I  love the fruit, the jam would be a sure hit (it was) and with this recipe,  canning season for me comes to a close.
            While this is a sweet jam,  it can be used as a base for other add-ins...  caramelized red onions or bacon for example.  This can be turned into a topping for crostini with a little fresh goat cheese or perhaps on a half bagel, with some crispy crumbled bacon and then topped with a fried egg for breakfast?  (just brain-storming here...)

            Finding a recipe for fig jam wasn't as easy as I thought it would be,  but I eventually stumbled upon one.  I used it as a guide,  but ended up changing a few things.  I rarely stick to an exact recipe unless it's baking,  those you really can't veer off too much or it could prove disastrous.

            The recipe I found called for 6 cups of sugar & only 4 cups of figs.  I thought this was a bit much on the sugar so I adjusted it.  Jam should be sweet,  but it shouldn't cause a diabetic coma or send you to a dentist...


            Fig Jam
            • 4 pints figs, roughly chopped (about 28 - 30)
            • 1/2 cup + 2 tbsp fresh lemon juice
            • 1/2 cup water
            • 1 tsp butter
            • 3 cups sugar
            • 4 tbsp low sugar pectin
            • 8 half pint glass jars (with lids & bands)

            1. Prepare water bath.  Heat jars and lids in simmering water.  Do not boil.
            2. Cut stems off figs and roughly chop.  I used Black Mission figs here, but any variety of fig will do.

            3.  Combine figs, lemon juice, water, butter & sugar in an 8 qt pot and bring to a rolling boil.
            4.  Add pectin and continue hard boil for 1 minute, stirring constantly.


            5.  Ladle hot jam into jars leaving 1/4 space. Wipe rim, put lid and band on. Do not over-tighten.
            6.  Process in a water bath for 10 minutes.  Remove jars and cool.
            7.  Check for seal.  If you have one that did not seal properly, refrigerate and use within a month.

            
             Rosy- Hued Fig Jam

            October 15, 2011

            ...Eating Her Curds & Whey


            What exactly is poutine you might ask...   besides ridiculously good and wrong on so many levels,  poutine is a Canadian dish consisting of 3 ingredients: french fries topped with cheese curds & smothered in gravy. The tell tale sign of good cheese curds:  they squeak when you bite them and squeak these did!  You can imagine my skepticism, being a Midwesterner (and half Canadian) of finding good cheese curds in Brooklyn of all places.  As those of you familiar with it know, the East coast isn't exactly "poutine" country.   I was happily surprised...  let the gluttony commence.

            What may be a new discovery for some,  the rest of us have known for awhile.  Poutine is delicious, but here's the thing...  you shouldn't exactly make it a habit,  unless of course a diet of cholesterol & high-blood pressure medications are what you are aiming for.

            I know that not everyone's world revolves around food like mine does, but I know that I am not alone in certain memories being linked to food.  I remember the first time I ever had french fries with gravy on them.  I was in Newfoundland with my younger cousin (Nancy) and we were sitting in a red vinyl- covered booth  in a little diner in the mall.  I remember thinking "this is FANTASTIC,  why don't we ALWAYS put gravy on fries?" (I have ever since...) Now, add fresh cheese curds to that & we are in business!

            Last weekend,  I happened to be perusing one of my food magazines and there it was:  a mention for a restaurant in Brooklyn serving poutine.  You can imagine my next thought (go there immediately), so we did.  The smell of french fries lingered in the air,  beckoning us over the threshold into full-on bliss.  I was hoping I wouldn't be disappointed and I wasn't.  The poutine delivered, in a big way.  It was delicious.

            While sitting there eating my curds and fries I stopped and just started to laugh.  I looked at where we were sitting and thought "Deja Vu".   We were sitting in a red vinyl booth...

            October 05, 2011

            In a Pickle...

            In the Midwest, and certainly other parts of the country, the end of summer marks canning season at it's height.  This is when the air smells of ripe tomatoes being "put up",  jars of preserves and jams lining the kitchen counter like a glass army of winter provisions...  cabinets and cellars receive the summer's bounty before colder temperatures bring the first frost.

            Canning may be a lost art form in other parts of the country,  but if you're near an agricultural area you are very familiar with the process.

            My step-dad & I used to do this as a two man operation...   It was a bit of an elaborate set-up.  There were two stoves working simultaneously, I was at one cooking the fruit and he was at the other sterilizing jars.
            We'd meet at the halfway point for the hand off: 
            He'd sterilize the jars,  bring them to me piping hot,  I'd fill them and put the lids on then take them back out to him to process and seal.  We ran our operation like a well-oiled machine (he IS German, so there's really no other acceptable way).

            Bread and butter pickles have always been my favorite.  They are sweet and yet have a little bite from the vinegar and they remind me of my Grandfather, they were his favorite too.  I sometimes feel obligated to "Chef" it up a bit,  but at the end of the day I'm just a girl from Ohio and the simple, familiar things are what I crave.

            For this recipe,  I used Kirby cucumbers that I bought at the farmer's market.  
            The beauty of this is there are few hard & fast rules, but if you chose to use a different cucumber, make sure it is a pickling cucumber.


            Bread & Butter Pickles

            • 6 medium Kirby cucumbers, about 7 lbs.
            • 2 medium onions, thinly sliced
            • 3/4 c. salt
            • 2 cloves garlic, smashed
            • 4 c. sugar
            • 2 c. white vinegar
            • 2 c. apple cider vinegar
            • 1 c. water
            • ice cubes
            • 4 tbsp. pickling spice blend
            • 1 1/2 tsp. turmeric

            Pickling Spice
            • 6 tbsp. mustard seeds
            • 3 tbsp. celery seeds
            • 2 tbsp. coriander seeds
            • 1 tbsp. whole allspice
            • 4 bay leaves, crumbled
            • 1/4 tsp. white peppercorn
            • 1/4 tsp. green peppercorn


            1.  Slice cucumbers into rounds,  the easiest and fastest way to do this is with either a food processor or a mandoline.   I have an inexpensive Japanese style mandoline that I use and it works perfectly.  A mandoline or food processor will ensure that the slices are uniform and you'll be done in a fraction of the time it takes to slice everything with a knife.

            2. Combine sliced cucumbers, sliced onions and crushed garlic with salt in large bowl and toss to coat evenly with the salt.  Cover with ice cubes and let stand.  The purpose of this is to pull some of the moisture out of the cucumbers.  The salt will leach the liquid out of the cucumbers and onions helping them to retain a crunchy texture.  They can stand anywhere from 3 hours to overnight,  but patience is not a virtue I possess, so 6 hours was my limit. 

            3. Sterilize your jars and lids and let them sit in the hot water until you are ready to go. You could take them out and let them drain if you like, but I was told to just leave them in the hot water until I am ready to fill them, so that's what I do.

            4. Drain the cucumbers and rinse if you like.  Discard the garlic.  (Salt & I are very good friends, so I chose not to rinse mine, but if you two aren't as close perhaps you'd care to rinse some of the salt off before you proceed).

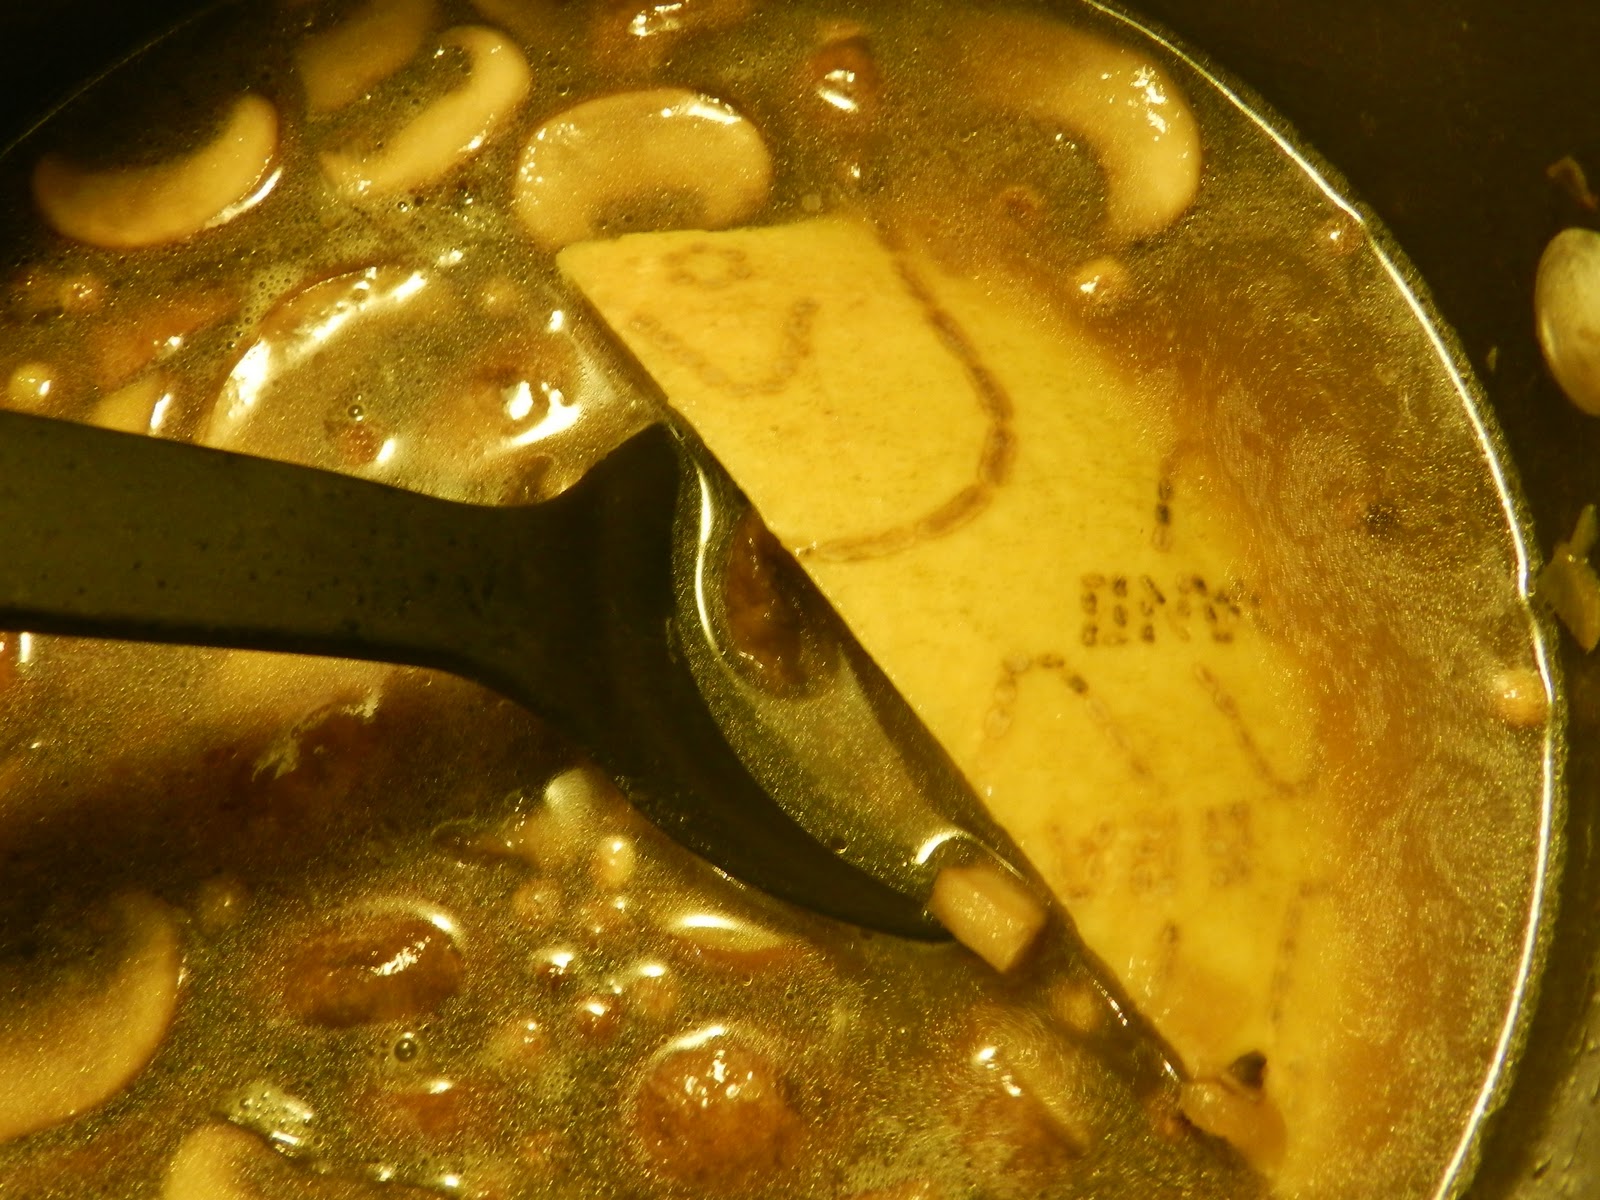
            5.  Combine the vinegars, water, sugar, turmeric and pickling spices in a large pot.  Bring to a boil,  then add in cucumbers and onions.  Return to a boil and then shut off.  Do not boil the cucumbers, get the liquid back up to the boiling point and then immediately turn off the heat.

            6. Ladle pickles into glass jars, leaving about a 1/2" space on top and put the lids on.  Do not tighten the lids to the point that the air can't escape from the jar, but tighten enough that water won't go pouring into your pickles.

            7. Carefully lower them into the pot and process.  I had a few different sized jars, so I pulled the smaller ones out at 10 minutes and left the large ones in for another 5 or 10 minutes after that.  If you do not have special "canning" tongs that are coated with rubber, make sure to wrap a dish towel around your metal tongs when removing the jars from the hot water.  (don't take a chance on chipping or cracking the glass).

            8. Leave them to cool on the counter, step back and swell with pride at your creation.


              September 30, 2011

              Falling for Fregula

              One of the best things to come out of Sardinia as far as I'm concerned is fregula (or fregola).  It is a toasted semolina pasta and it is similar in size to Israeli Couscous.  They are chewy, toasty little pearls and this is one of my favorite recipes for days when I need a little extra something.


              I happen to live in a predominantly Italian neighborhood, so finding this isn't difficult but if you aren't that lucky you can find it online (or have a friend mail it to you!).  Another option if your grocery store doesn't carry it, is to ask them to start!  Most stores are happy to oblige if they know someone will buy it.

              The first time I had fregula was in culinary school and I was instantly hooked.  The pasta is unlike anything else. It has a dense, chewy texture that you just don't get with regular pasta.  It holds up very well with hearty ingredients making it perfect for an autumn meal.


              Fregula with Creminis and Caramelized Shallots
              • 2 cups fregula
              • 1 clove garlic
              • 2 large shallots
              • 1/4 cup white wine
              • 1 large or 2 small packages cremini mushrooms
              • 4 cups chicken stock
              • 1/2 bunch parsley
              • 4 tbsp. olive oil
              • 1 Parmesan cheese rind (optional, yet necessary)


              1.  In a medium stock pot, heat oil over medium-high heat. Finely slice shallots and add to pot.  Stir to coat and let them cook, undisturbed for 5 - 10 minutes until they begin to caramelize.

              2.  Stir the shallots and let them continue to brown.  Once they have fully caramelized, add the wine.  Scrape the bottom of the pot to get all the yummy brown bits that have stuck to the bottom.

              3.  Next, slice the mushrooms and add them to the shallots.  Let the mushrooms cook down and release their liquid.  Add salt and pepper, lower heat to medium.

              4.  Mushrooms will need to cook down about 15 minutes, you'll see that they have released quite a bit of liquid and they are browned.  Smash the clove of garlic and add it to the pot.


              5.  At this point, add the fregula, stir it to combine, and add the stock.  This is where you add the cheese rind if you have one.  I know not everyone has one of these in the refrigerator, but if you do,  this is the perfect use for it.  It will lend a depth of flavor that nothing else can provide. 


              6.  Bring the fregula up to a boil and let it cook until al dente,  about 12 minutes.

              7.  Turn off the heat. Chop the parsley and add it to the fregula.  Stir to combine.

              8.  Serve with extra grated parmesan on top.


                September 24, 2011

                Farmer's Market Finds


                Everyone knows the behemoth that is the Union Square Farmer's Market
                I love it, but sometimes it's a bit overwhelming for me and getting all of my treasures home on the train is less than ideal.  
                So,  I opt for a smaller, more familiar Farmer's Market closer to home.


                This market may not offer the variety and sheer volume of vendors that the Union Square market does,  but it suits me just fine. 

                There is one particular vendor there that I make a bee-line for as soon as I step into market territory.  They make some of the best bread, cookies, pies and knishes I have ever had.  Their chocolate chip cookie makes my eyes roll back in my head.  The bread is crusty on the outside and soft and tender inside and the pies taste like they have a Midwestern grandma in the kitchen. But what I really go there for are the knishes.
                (oh the knishes...)


                Now, let me explain...  I have never been a fan of knishes.  The only ones I've ever had are those frozen squares that taste like cardboard.  You know the ones,  they need to be buried in mustard in order to get them down.

                THAT my dear friends is NOT a knish.  I have met the holy grail of knishes.  And I like it,  I like it ALOT.  This knish is so good you'll propose to it.  The mashed potato inside is sooo good (sour cream makes everything delicious), it is creamy and still has chunks of potato so you have a nice contrast in texture.  The crust is perfection.  It's not too thick, it is delicate and serves it's purpose of containing the mash quite nicely.  As soon as I get one, I put it in my bag and move happily along to the next vendor,  all the while thinking about sinking my teeth into it as soon as I get home and today was no different.


                A great day at the market, support your local farmers!

                September 17, 2011

                Soup's On!

                While I am not a fan of cooler weather,  the one thing I can appreciate is the comfort food that is ushered in with the chill in the air.   I love one-pot meals, mostly because I am lazy about washing dishes, but there is something rather "warm-fuzzy" inducing about a big pot of soup bubbling away... 
                The great thing about soups and other meals of this sort is they are fuss-free and that is a prerequisite during my hectic fall schedule  (besides the fact that my beloved Buckeyes are on every Saturday and I'm not one to miss a game).  Another added bonus is you can make a big batch and freeze it for days when you just can't fathom the thought of breaking out a saute pan.

                The variations on this are endless...  because it is fall I am using some root vegetables in the soup, however these vegetables can be changed out for any that you like.


                Autumn Minestrone


                • 8 cups vegetable or chicken stock
                • 1 lg. Spanish onion, chopped
                • 2 stalks celery, chopped
                • 3 carrots, chopped
                • 2 tbsp tomato paste
                • 3 cloves garlic,  minced
                • 1- 15oz can chopped tomatoes
                • 1/4 cup olive oil
                • 1 medium zucchini, chopped
                • 1 med yellow squash, chopped
                • 1/2 butternut squash, chopped & roasted
                • 3/4 cup ditali pasta
                • 1-  16 oz can kidney beans
                • 2-3 tbsp flat leaf parsley, chopped
                • 1/2 cup grated Parmesan
                • kosher salt
                • black pepper
                1. Heat olive oil over medium heat in a large pot.  Add in carrots, celery and onion.  Cook until onions are translucent and carrots are slightly soft,  about 10-15 minutes.

                2. Add garlic and cook 2 minutes.   Add tomato paste and cook for a few minutes.

                3. Add chopped tomatoes, chicken or vegetable stock and kidney beans.  Season with salt & pepper.

                4. Add zucchini, yellow squash, butternut squash and pasta.  Cook for about 10 minutes until pasta is al dente.

                5. Remove from heat and stir in parsley.  Check for seasoning and add salt & pepper if necessary.

                6. Sprinkle with grated parmesan when serving.

                September 10, 2011

                No Bones About It...

                10 weeks old

                Now that the "dog days" of summer are over, I find myself baking treats for my canine companion.  She loves sweet potatoes almost more than any other thing on earth,  so it was essential to incorporate them into her treats.

                For those of us that love our pets like we gave birth to them,  making something special for them is not out of the ordinary...  but for those of you that may not be pet-lovers I suppose it may seem a bit odd.

                Our dog Cleo used to love these treats when my Mom would make them for her,  so she sent me the recipe so I could make them for my little one.  They are pretty quick to get together and not complicated at all, so the whole process is pretty painless.

                Considering all of the unconditional love they give us and never ask for anything in return,  making our beloved pets a special treat every now and then is a pretty good trade-off.


                "Sugar" Cookies
                • 1 cup all-purpose flour
                • 1 cup wheat flour
                • 1/2 cup powdered milk
                • 1/2 cup wheat germ
                • 1/2 tsp salt
                • 6 tbsp. butter
                • 1 egg
                • 1 tsp brown sugar
                • 1 cup mashed sweet potato (you can use carrots or other vegetables, if not using sub water)

                1.  Combine flours, wheat germ, milk powder and salt in a large bowl.
                2.  Cut in butter until mixture resembles coarse crumbs.
                3.  Beat the egg and add the sugar to the egg and whisk to combine.
                4.  Add the mashed sweet potato and make a stiff dough.
                      (you may have to add more flour, it should feel like a biscuit dough)
                5.  Knead on a floured surface until dough is smooth and pliable,  then roll out to 1/4" thickness.
                6.  Use a small cookie cutter to cut out your shapes. 
                      (I used a 2" star)

                ready for the oven...

                7.  Lay your "cookies" out on a lined sheet pan, egg wash the top (or brush with cream).
                8.  Bake at 325 degrees until light golden brown (about 30 minutes)


                Sweet Potato "Cookies"

                September 05, 2011

                From Market to Mouth

                Every summer when I see zucchini blossoms at the farmer's market,  I have an uncontrollable desire to make this dish.  The flowers are so beautiful that I just can't resist them.

                The finished plate is quite striking and it works perfectly for a dinner party or special occasion at home. 

                The biggest decision you have to make really is which cheeses to use.  Buy the best quality cheese that you can afford.   If there is one particular cheese you love,  make that the star of the show,  but remember it is all about balance.

                Each cheese brings something special to the plate: different textures, different levels of salt, one might melt better than another while a different one will help bind everything together.

                Sadly, summer is coming to a close so get these while you still can.


                Tempura-Battered Zucchini Blossoms stuffed with 4 cheeses
                For this you'll need:
                • 6-8 zucchini blossoms
                • 1 cup grated manchego cheese
                • 1/4 cup blue cheese
                • 1/2 cup cream cheese
                • 1/4 cup goat cheese
                • 2 cups rice or all-purpose flour
                • 2 cups water
                • 1 egg
                • canola oil

                 First, make the cheese filling:  Combine all four cheeses in the food processor until smooth and completely combined.  Taste for seasoning,  add salt & pepper.  Fill a piping bag, or a quart-sized storage bag with the filling and set aside.


                Next, open the flowers very carefully and pull out the pistil:


                Cut the tip off of the piping bag, or the corner of the storage bag and carefully fill the flowers:


                Once all the flowers have been filled,  gently pinch them shut to seal the cheese inside.

                Put the flowers in the refrigerator for about an hour to set up.  If the cheese is not cold when you fry them,  it will melt immediately and run out into the oil.


                Next, make the batter by combining the egg with the water, then whisk in the flour. It should be a little thinner than pancake batter. Set aside.


                Heat approximately 6 cups of oil in a medium sized pot over med-high heat. If you have a thermometer, the oil should be at 350 degrees. Make sure you have at least a few inches to the top of the pot for safety. Boiling oil can be very dangerous, better to be safe and leave yourself a little extra room.

                Dip the flowers into the tempura batter and gently "sweep" it across the surface of the oil before you let it drop:


                Fry a few minutes until golden brown, then using a metal strainer or "spider", remove from the oil and set on paper towels to drain.

                Plate while warm and enjoy this delicate treat before warm, sun-filled days come to an end...  I hope you all had a wonderful summer and had plenty of good food with friends and family.


                Dinner Party with Friends:
                "family style"


                Dinner at Home:
                individual plates


                Happy Eating!